/ Special category
Click thumbnail to view
  |
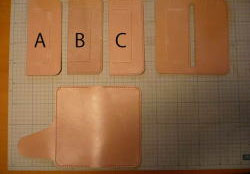
Pattern jig for leather craft : Wallet / 1pc
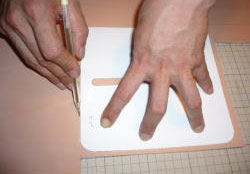
Step 1a
It will copy in such as silver pen types in leather .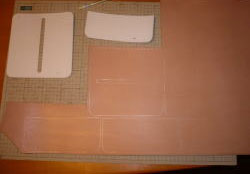
Step 1b
Step 2a
It will cut slightly larger than the actual size of all the parts .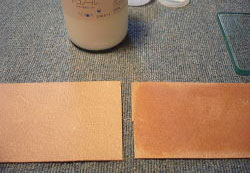
Step 2b
The floor surface ( leather back ) and washed with such Tokonoru in stage ( trim ) put and would be good .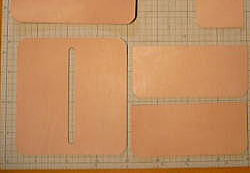
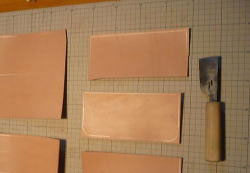
Step 2c
It will cut all the parts on the inside of the scribe line . If you are not familiar with the cut , the curved portion is cut little by little , you may arrange with a file at a later time. Point than too cut , is to cut slightly larger .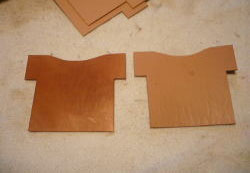
Step 2d
If you put such neat foot oil at this stage it will be to protect and promote discoloration of leather
Step 3a
It will polish the edge of the pocket top ahead . If you put the decorations just in case , put the decoration nen By twisting the screw here . Nen argument is not put slowly carefully force , you may draw on the feeling of much tracing several times .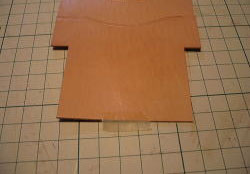
Step 3b
It will temporarily stop once with double-sided tape or the like . This step is required for positioning of when to put a pocket in the base .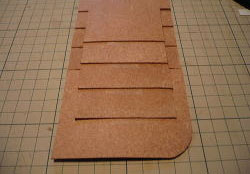
Step 3c
State that connected all of the pocket in the tacking (Viewed from the back )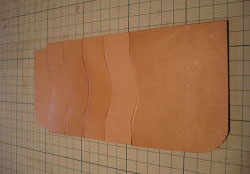
Step 3d
And then tacking while watching the entire balance on the card holder base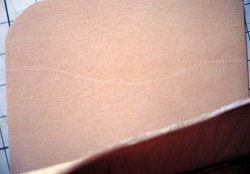
Step 3e
The scribe Masu to thin base line of the top pocket . It is required when positioning after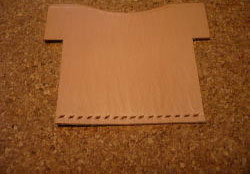
Step 3f
Remove the tacking , you open the sewing hole . ( Location of about 2mm ~ 3mm from the bottom)
Step 3g
And roughened so that it is easy to adhere the adhesive surface to the base pockets both . (As little fluffed )Positioning uses the scribed line 4. In this case , let's vandalism an adhesive portion and a pocket adhered portion of the surrounding base in width of about 5mm.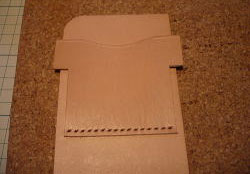
Step 3h
It will adhere the pocket . And bonding or the like white bond so as to be along perfect for the scribed line 4. Bond coating is applied to the Ryosode part and skirt part and likened the pocket T-shirt . After completion adhesion , open the hole to the base in advance and drilled holes in the guide , and sewn .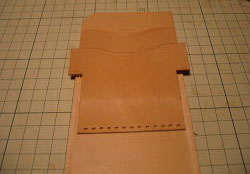
Step 3i
Photo but flew , top pocket Ryosode part is fit from the back to the base , was cut the jumping portion .We will repeat the procedure of 7. From the second stage . By the thickness of the leather to be used , because it has changed is more the rest of the sleeves , sleeves in this manner will have longer . Since the difference in level occurs in the adhesive during the sleeves , firmly pressed , please crimping .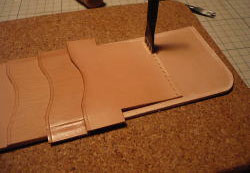
Step 3j
The first stage - to 4 -stage , it is repeated the adhesive → drilling → sewing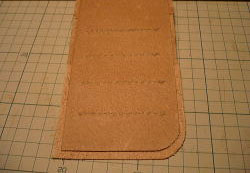
Step 3k
Is bonded to the end of the pocket , cut the excess portions were combined from the back to the base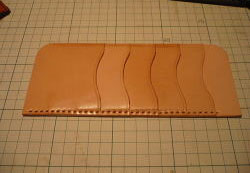
Step 3l
And it opened the sewing hole of the purse inside line , and sewing . Holes and stitches will be clean so as to straddle the pocket boundary . This production example uses a diamond perforations of 2.5 pitch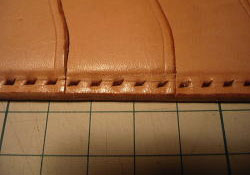
Step 3m
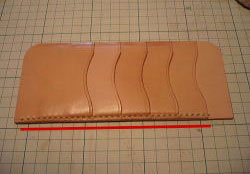
Step 3n
This is a state in which you have finished sewing . ※ In this case , the outer periphery of the card holder will stitch only photo red line part . The remaining three sides it will stitch in the process of " 5. make the exterior " .Here let's polish the edge . Especially where the overlap purse inside line and exterior flaps leave treatment here because it is difficult Shine later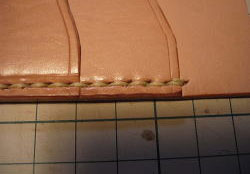
Step 3o
Step 4a
1. Open the hole and sewing to the exterior parts . Then, the stacked card pocket that made the bill input A and earlier so as to face with each other exterior and floor , respectively And temporarily fixed respectively to the exterior , and the exterior surface on the exterior stitching holes in the guide , you can copy the hole . It is a point to keep the diamond eyes vertically . Especially card pocket part looks well in state opening the wallet . If the hole is not aligned in clean , stitch does not become clean . Let's carefully working . 2. Next, remove the temporary fixing of SatsuIri A, you can open the connection for sewing hole from the bill input B and overlapping parts periphery in the degree 3cm.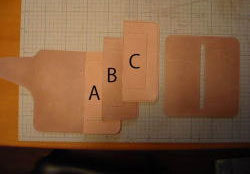
Step 4b
3. Next, open the sewing holes on the outer periphery three sides of SatsuIri B, overlaid so that the floor of the bills input B and SatsuIri C face each other , you can copy the periphery sewing hole of bills input B to SatsuIri C. It will open the connection for the sewing hole of the coin purse to 4. bill input C. Procedure is the same as when the SatsuIri A · B
Step 4c
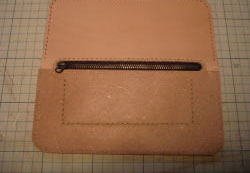
Tags entering the top , it will polish the edge of the coin purse zipper part .
Step 4d
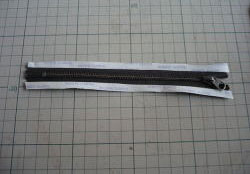
Step 4e
Attach the zipper . It will open the sewing holes for fastener installation. And paste the double-sided tape to the fastener , and paste the zipper from coin purse back . In the production example we are using zipper length 15cm.※ The fastener has a dimensional tolerance , might be different is a few millimeters the length in the zipper of the same length display . Please adjust the size of the aperture to suit the fastener to be actually used. → Learn More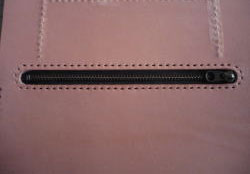
Step 4f
Step 4g
It will stitch around zipper . Next, in order to make the coin purse in a bag shape , and a hole sewing in a three-way around . First, a hole is sewing on a surface that is visible when you open the wallet , and then folded in two , you copy a hole under the surface sewing hole in the guid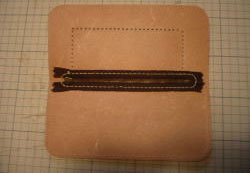
Step 4h
Step 4i
I consolidated sewn consolidated for sewing hole portion tags input C and coin purse .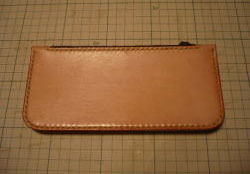
Step 4j
Stitched coin purse around .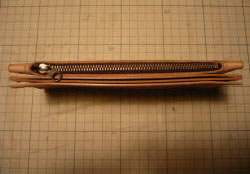
Step 4k
I consolidated sewn consolidated for sewing hole portion tags input A and SatsuIri B
Step 4l
Consolidated stitched the outer circumference hole of bills input B and SatsuIri C.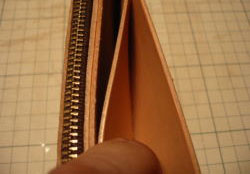
Step 4m
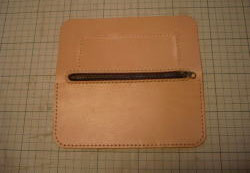
Like the photo , stitched in the order of [ Purses → Tags input C → Tags input B → Tags input A ] from the top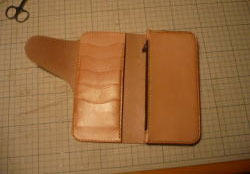
Step 5a
It will adhere the wallet - card pocket on the exterior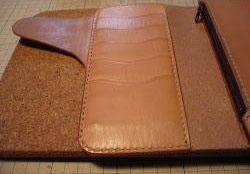
Step 5b
We sewed all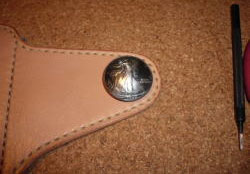
Step 5c
It makes the positioning of Concho . Place the part you want to add a Concho , because you play from the top Concho type of leather stick , it is easy and the hole in the center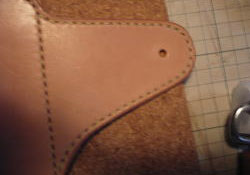
Step 5d
Eyelet I opened the 4mm hole in the vent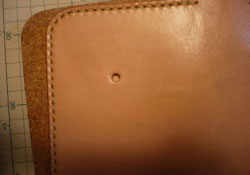
Step 5e
And to state that folded the wallet , you can copy the previous hole on the opposite side . Since the position of the hook is changed depending on the thickness and material of your use of leather , it is a good idea to position at this stage . We opened the 4mm hole in the same way.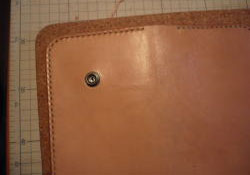
Step 5f
The Masu caulking the hook . Insert the hard plate between the bills input A and the exterior , you may type in it to underlay .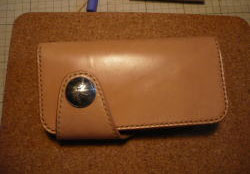
Step 5g
It is complete with polished all of the edge